How to Wear Clip-In Hair Extensions

How to Wear Clip-In Hair Extensions are a simple, reusable solution for adding instant volume and length without the commitment of permanent extensions. They’re perfect for anyone who wants salon-quality results at home. If you have the chance to see a certified Laced Hair stylist, they can customize the placement and blend the extensions for you. But if not—don’t worry! With our step-by-step guide, you’ll be able to install them yourself in just minutes.
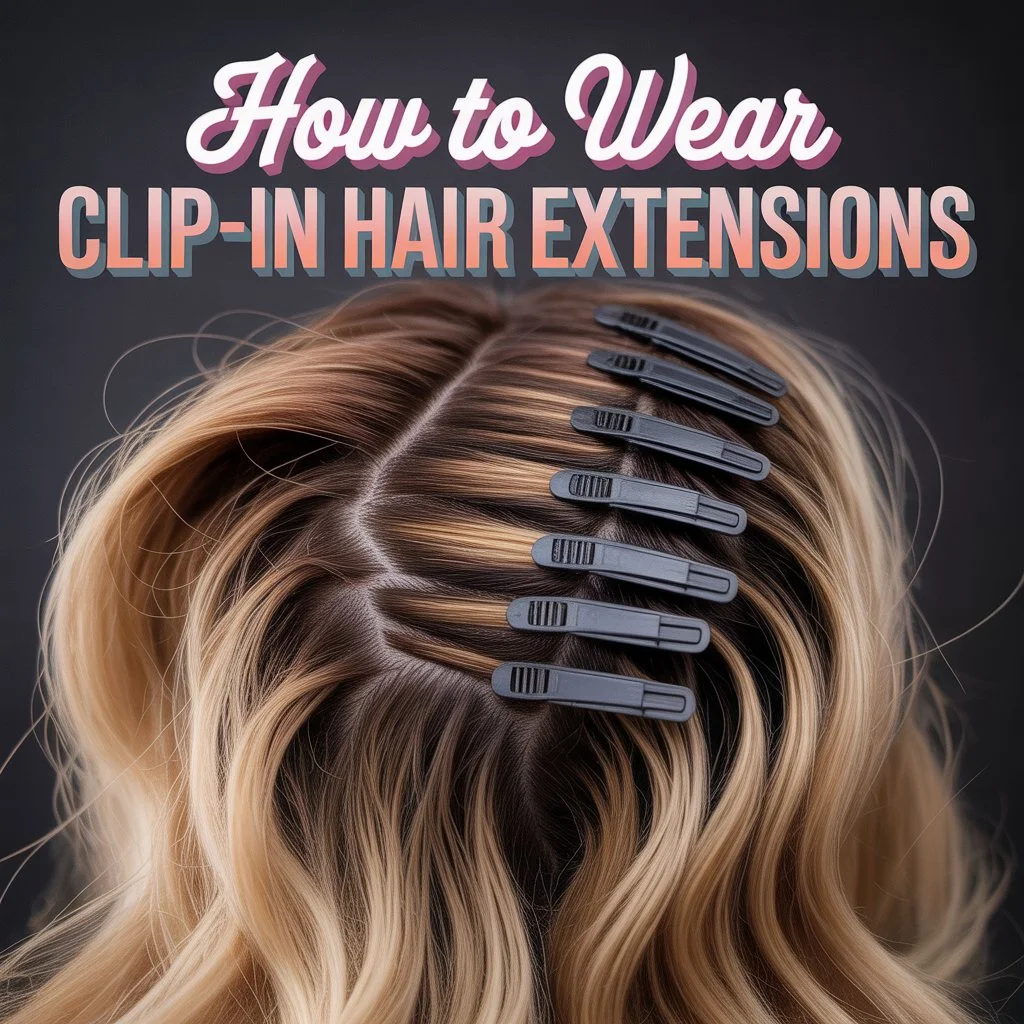
Each set includes 8 pieces: 4 for the back and 4 for the sides, designed for a natural, seamless look.
Caring for Your Clip-In Extensions
To keep your extensions looking fresh and full for as long as possible, follow these care tips:
- Wash gently with sulfate-free shampoo.
- Condition regularly to maintain softness.
- Apply lightweight oils or serums to keep them nourished and silky.
Proper care extends the life and quality of your clip-ins, so they look flawless every time you wear them.
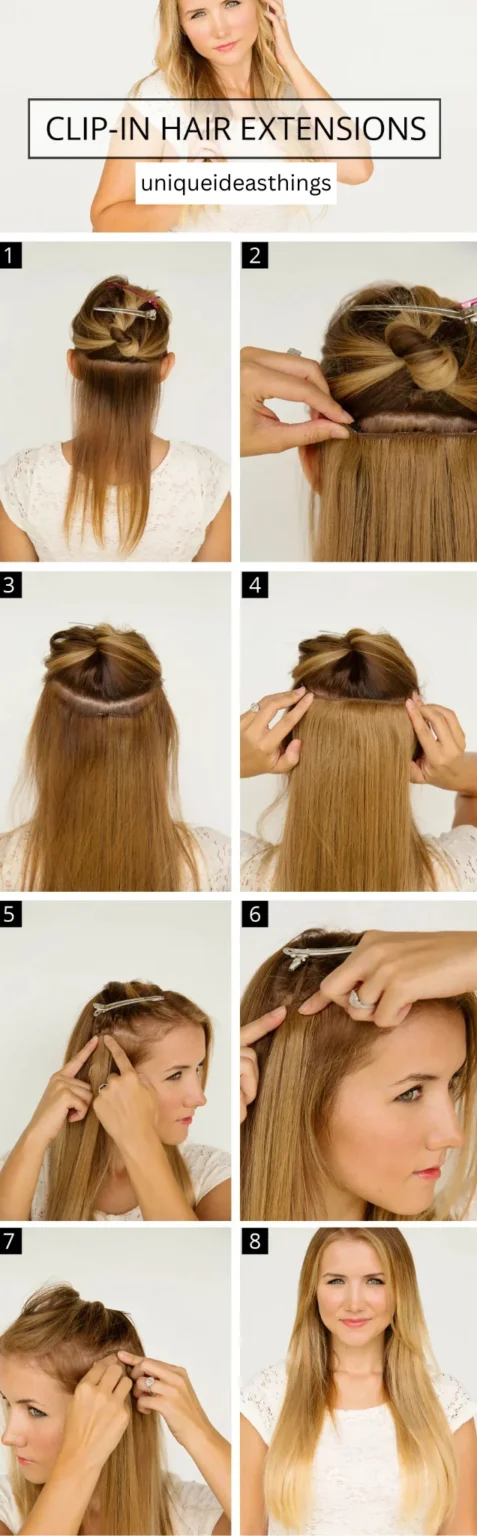
Step-by-Step Directions
Step 1:
Using a tail comb, create a horizontal part about 1 inch above the nape of your neck. Secure the upper section of your natural hair with a clip.
Step 2:
Take the first 6″ weft and position it along the part. Start with the center clip, then snap it in place. For extra hold, lightly tease your natural hair at the root before clipping.
Step 3:
Secure the side clips, making sure the weft lays flat against your head.
Step 4:
Repeat the same process for each remaining piece:
- Install the second 6″ weft directly above the first.
- Add the 7″ weft above that.
- Finish the back with the 9″ weft at the widest part of your head.
Step 5:
Place the 1.5″ wefts on each side of your head to frame your face and complete the look.